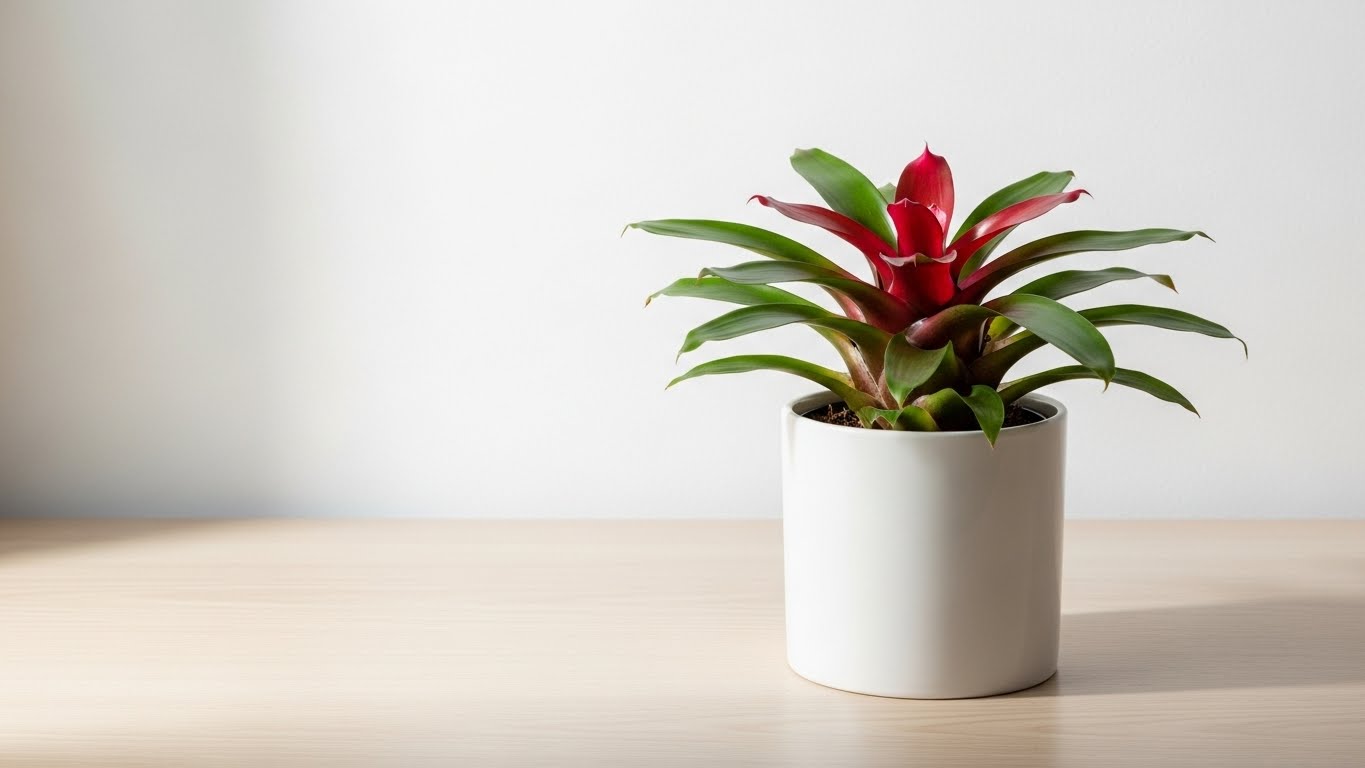
Indoor bromeliads are fun and colorful plants that can liven up your space! To care for them, give them bright, indirect light and water every week in warmer months. Make sure the soil’s airy and well-draining, using a mix designed for bromeliads. Feed them some fertilizer during growing seasons, and be on the lookout for pests like mealybugs. If you spot any, take action quickly! Stick around, and you’ll find out more about keeping your bromeliads thriving!
Key Takeaways
💡 Ensure your bromeliads thrive all year long with a comprehensive care calendar.
➜ Get the step-by-step guide
- Provide bright, indirect light for about 12 hours daily to support healthy bromeliad growth.
- Water every 1-2 weeks, adjusting frequency based on humidity and seasonal changes.
- Use a well-draining potting mix and ensure pots have drainage holes to prevent root rot.
- Fertilize every 4-6 weeks during the growing season with diluted fertilizers for optimal nutrition.
- Regularly inspect for pests and remove dead leaves to maintain plant health and promote growth.
Understanding Bromeliad Varieties
When you think about bromeliads, you might picture colorful, exotic plants that add a splash of life to any indoor space. There are various bromeliad types, each with unique plant characteristics that make them special. For instance, the vibrant Guzmania features tubular flowers and narrow leaves, while the hardy Aechmea has rosette-shaped foliage and stunning blooms. You might also encounter Neoregalia, known for its striking colors and patterns. Each variety brings its own charm, whether it’s the texture of the leaves or the shape of the flowers. By exploring these different types, you can find the perfect bromeliad that suits your style and living space, creating a delightful indoor garden that reflects your personality. Additionally, understanding the unique lifestyle of many bromeliads can greatly enhance your ability to care for them effectively.
Ideal Light Conditions
When it comes to lighting for your indoor bromeliads, they thrive best in bright, indirect light. You’ll want to keep them away from direct sunlight, as it can scorch their leaves and stunt their growth. Finding the right balance will help your bromeliads flourish and show off their vibrant colors!
Bright, Indirect Light
To guarantee your bromeliads thrive indoors, you need to provide them with bright, indirect light, which mimics their natural habitat under the canopy of trees. Aim for a light intensity that’s bright but not overpowering, as too much direct sunlight can scorch their leaves. Place your bromeliads near a window where they can enjoy filtered light—think sheer curtains or blinds. The ideal light duration is about 12 hours a day, so consider using grow lights if natural light isn’t sufficient. Regularly rotating your plants can assure even light exposure, promoting balanced growth. By creating these perfect lighting conditions, you’ll help your bromeliads flourish and bring vibrant life to your indoor space.
Avoid Direct Sunlight
While bright, indirect light is important for your bromeliads, you also need to keep them away from direct sunlight, which can be a sneaky culprit in indoor settings. Too much light exposure can scorch their leaves, leading to damage and wilting. It’s essential to find that sweet spot where your bromeliads thrive without facing temperature extremes caused by harsh rays.
Here’s a handy guide to help you:
Light Exposure | Ideal Distance | Signs of Trouble |
|---|---|---|
Indirect Light | 2-4 feet from a window | Yellowing leaves |
Filtered Light | Behind sheer curtains | Browning leaf tips |
Low Light | In a well-lit room | Stunted growth |
Proper Watering Techniques
When it comes to keeping your bromeliads happy and healthy, mastering proper watering techniques is key. You’ll want to know how often to water and the best methods to guarantee your plants thrive. Let’s explore the ins and outs of watering frequency and the most effective ways to give your bromeliads just what they need!
Watering Frequency Guidelines
How often should you water your bromeliads to keep them thriving? It’s essential to maintain the right moisture levels, as these lovely plants prefer a balance. Check for watering signs like drooping leaves or dry soil. Typically, you’ll want to water every 1-2 weeks, but factors like humidity and temperature can change that. Here’s a handy table to guide you:
Season | Watering Frequency | Signs to Watch For |
|---|---|---|
Spring | Every 1 week | Slightly dry soil |
Summer | Every 5-7 days | Leaves starting to droop |
Fall | Every 1-2 weeks | Soil moisture retention |
Winter | Every 2 weeks | Dry leaves or soil |
Adjust your schedule based on your bromeliad’s needs, and you’ll create a thriving indoor oasis!
Best Watering Methods
After you’ve figured out how often to water your bromeliads, the next step is mastering the best watering methods to keep them healthy and happy. Using effective watering techniques is key to ensuring proper moisture retention. Here are three methods you can try:
- Filling the Cup: Pour water directly into the center cup of the bromeliad. This mimics their natural habitat and helps with moisture retention.
- Soaking: Submerge the pot in a basin of water for about 30 minutes. This allows the roots to absorb moisture without drowning them.
- Misting: Lightly mist the leaves regularly to boost humidity levels, especially in drier environments.
Soil and Potting Requirements
Choosing the right soil and potting for your indoor bromeliad is essential, as it directly impacts the plant’s health and growth. You’ll want a potting mix that allows for good airflow and moisture retention. A blend specifically designed for bromeliads or orchids works wonders, as it often contains bark, peat, and perlite.
Don’t forget about drainage requirements! Confirm your pot has drainage holes to prevent water from pooling, which can lead to root rot. When potting, give your bromeliad some room to breathe; a slightly snug fit is perfect. Repot every couple of years to refresh the soil mix and promote healthy growth. By nurturing your bromeliad’s roots, you’re setting the stage for a vibrant, thriving plant!
💡 Misting is crucial for bromeliad health; learn how to do it effectively.
➜ Discover proven techniques
Fertilizing Your Bromeliad
When it comes to keeping your bromeliad happy and healthy, fertilizing is key! You’ll want to choose the right type of fertilizer and know how often to apply it for the best results. Let’s explore which fertilizers work wonders and how to keep your plant thriving with just the right amount of nourishment!
💡 Fertilizing bromeliads can be tricky; ensure you do it right with expert tips.
➜ Master this approach
Best Fertilizer Types
To keep your bromeliad thriving, selecting the right fertilizer can make all the difference. You’ll want to choose something that provides essential nutrients without overwhelming your plant. Here are three fantastic options:
- Liquid Nutrients: These are easy to apply and quickly absorbed, giving your bromeliad an instant boost.
- Natural Fertilizers: Organic options like compost or worm castings nourish your bromeliad gently, promoting healthy growth without chemical additives.
- Balanced Fertilizer: Look for a balanced liquid fertilizer with equal parts nitrogen, phosphorus, and potassium for thorough nourishment.
Application Frequency Guidelines
Properly fertilizing your bromeliad is essential for its health and vibrancy, but knowing how often to do it can be a bit tricky. To keep your plant thriving, aim for every 4 to 6 weeks during the growing season, typically spring and summer. This application timing guarantees your bromeliad receives a steady supply of nutrients, promoting a healthy nutrient balance. During the fall and winter, you can cut back, fertilizing once every 2 to 3 months since the plant’s growth slows down. Always remember to dilute the fertilizer to prevent any burn. With these guidelines, you’ll help your bromeliad flourish, showing off its stunning colors and lush foliage. Your care truly makes a difference!
Humidity and Temperature Needs
Bromeliads thrive in environments where humidity and temperature mimic their natural tropical habitats, so it’s crucial to create the right conditions for these vibrant plants. To guarantee your bromeliad enjoys the best bromeliad humidity and meets its temperature preferences, keep these tips in mind:
- Humidity: Aim for 50-70% humidity. You can increase this by misting or placing a humidifier nearby.
- Temperature: They love warmth! Keep your bromeliad in a range of 65°F to 80°F (18°C to 27°C) for ideal growth.
- Avoid: Protect your plant from cold drafts and sudden temperature changes, as they can stress the plant.
Common Pests and Diseases
Even in a cozy, warm environment, your bromeliad can face challenges from pests and diseases. To keep your plant thriving, it’s essential to focus on pest identification and disease prevention. Common pests like mealybugs, aphids, and spider mites can invade your plant, sucking the life out of it. Check the undersides of leaves and the central rosette for any signs of these unwanted guests. If you spot them, act quickly with insecticidal soap or neem oil.
As for diseases, watch for signs of root rot or leaf spots, which are often caused by overwatering or poor air circulation. Ensuring proper watering and airflow will go a long way in protecting your bromeliad from these issues.
Pruning and Maintenance
To keep your bromeliad looking its best, regular pruning and maintenance are key! By following a simple maintenance schedule, you can guarantee your plant remains vibrant and healthy. Here are three essential pruning techniques to help you out:
- Remove Dead Leaves: Gently cut away any brown or dead leaves at the base to encourage new growth.
- Trim Flower Stalks: Once the flower has faded, use clean scissors to snip the stalk close to the base.
- Check for Pests: Regularly inspect your plant for any signs of pests, and prune affected areas immediately to prevent further damage.
With these tips, your bromeliad will thrive, bringing joy to your space!
Propagation Methods
After ensuring your bromeliad is healthy and well-maintained, you might feel inspired to expand your collection or share the joy of these vibrant plants with friends. One of the easiest ways to propagate bromeliads is through offsets, which are small plants that grow at the base of the parent plant. Simply wait until they’re a few inches tall, gently separate them, and pot them in fresh soil.
If you’re feeling adventurous, you can also try seed propagation, though it’s a bit trickier. This method involves collecting seeds from the parent plant and planting them in a suitable medium. Remember, whether you choose offsets or seeds, both methods can lead to new, beautiful bromeliads to enjoy!
Troubleshooting Common Issues
When you notice something off with your bromeliad, don’t worry—you’re not alone! Many plant lovers encounter issues, but recognizing and addressing them can keep your plant thriving. Here are some common problems and their fixes:
- Bromeliad Leaf Issues: If you see brown tips or discoloration, it might be a sign of too much sun or low humidity. Adjust its location and mist the leaves regularly.
- Root Rot: If your plant wilts or has mushy roots, it’s likely suffering from overwatering. To fix this, remove the plant from its pot, trim the rotten roots, and repot in fresh, well-draining soil.
- Pests: Check for small bugs on the leaves. A gentle wash with soapy water can help eliminate them.
Conclusion
Caring for bromeliads is like starting on an exciting adventure—each step reveals something new! By understanding their needs, from light and water to soil and pests, you can create a thriving indoor garden. Remember, these unique plants are resilient and adaptable, so don’t be afraid to experiment. With a little love and attention, your bromeliads will flourish, bringing vibrant color and joy to your space. Now, go ahead and let your green thumb shine!
💡 Blooming is the ultimate goal for many bromeliad enthusiasts; learn how to achieve it.
➜ See how to implement this


