If your succulent’s roots peek out of drainage holes or its leaves go yellow, it’s time to repot! Choose a well-draining soil mix that combines potting soil with coarse materials like perlite. Select a pot with drainage holes—terracotta is great. When repotting, carefully free the roots, remove any damaged ones, and place the plant in fresh soil. After repotting, monitor water and light. Want to learn more about keeping your succulents healthy and happy?
Key Takeaways
- Look for roots peeking out of drainage holes or yellowing leaves to determine if repotting is necessary.
- Use a well-draining soil mix with potting soil and coarse materials like perlite for optimal root health.
- Choose a pot with drainage holes that is slightly larger than the current pot to allow for growth.
- Carefully remove the succulent, trim damaged roots, and fill the new pot with soil around the plant.
- After repotting, monitor watering needs and place the succulent in bright, indirect sunlight for best results.
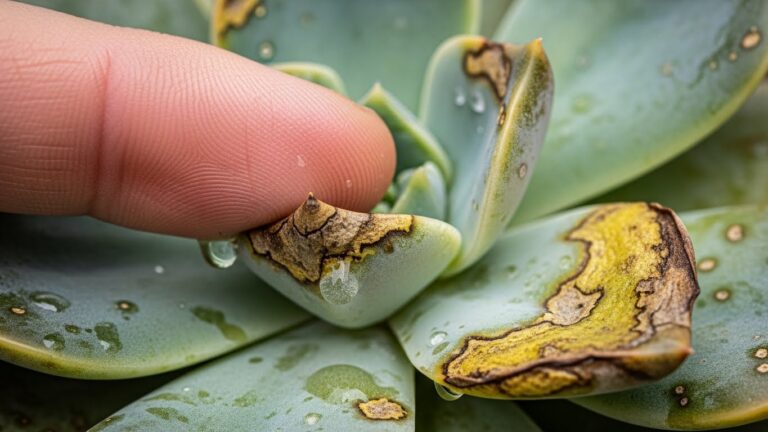
Signs Your Succulent Needs Repotting
When you notice your succulent looking a bit cramped or unwell, it might be trying to tell you something important: it’s time for a new pot! One of the clearest signs is when you see roots peeking out of the drainage holes or curling around the bottom. This means your plant’s root growth is outpacing its pot size. Another indicator is if the leaves start turning yellow or dropping off; this can signal stress from being root-bound. If you see stunted growth too, that’s a sure sign it’s time to upgrade. Remember, a larger pot allows your succulent to thrive by giving those roots more space to grow and absorb nutrients. Additionally, using a commercial mix designed for succulents can further promote healthy root development. So, don’t hesitate—help your plant flourish!
Choosing the Right Soil for Succulents
Choosing the right soil for your succulents is essential for their health and growth, and there are three key factors to take into account. First, consider the soil types; a mix of potting soil and coarse materials like perlite or sand works wonders. This combination promotes aeration and mimics their natural habitat. Second, focus on drainage requirements. Succulents thrive in well-draining soil, preventing root rot by allowing excess water to escape quickly. Finally, avoid heavy soils that retain moisture, as they can spell disaster for your plants. Remember, a good soil mix not only supports root health but also encourages vibrant growth. So, when you’re repotting, make sure your succulents have the best foundation to flourish!
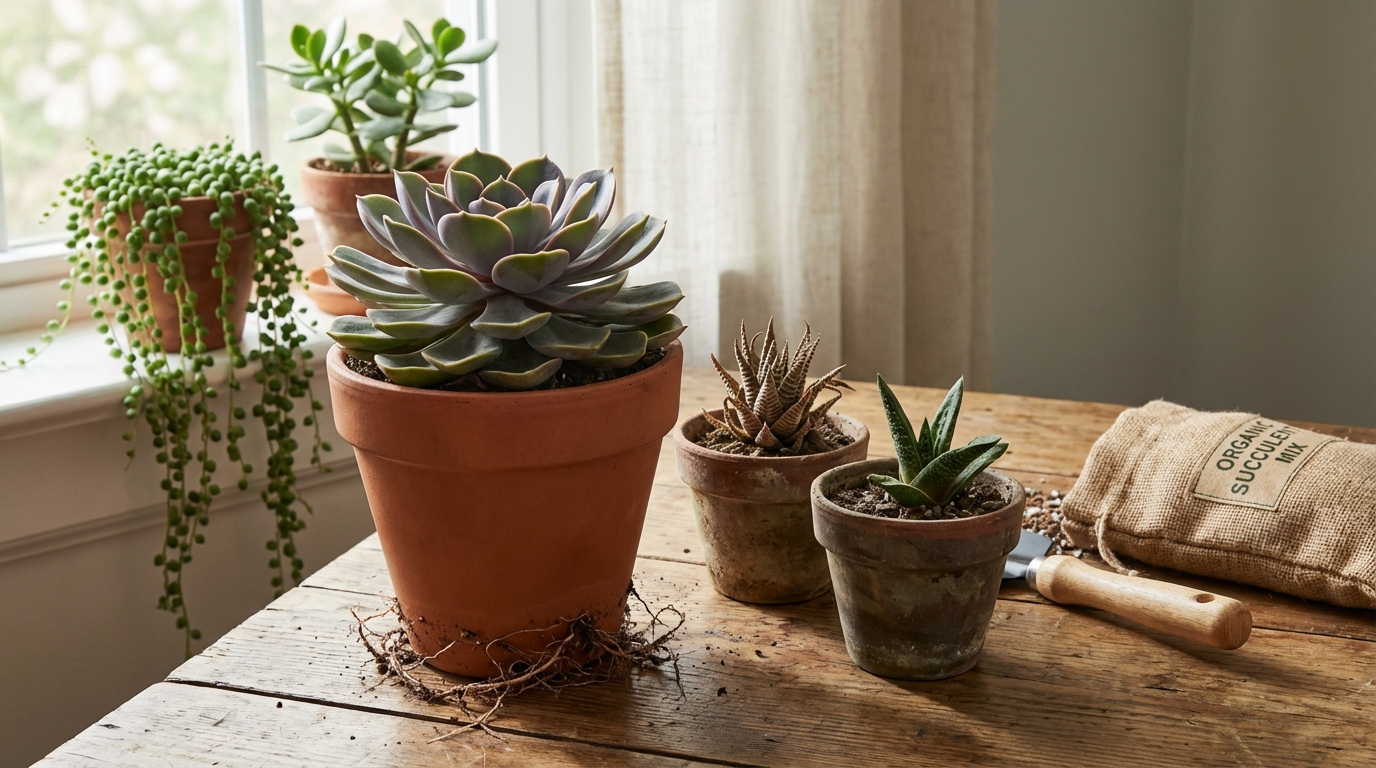
Selecting the Perfect Pot
Selecting the right pot for your succulents can make all the difference in their growth and overall health. First, consider pot size; a pot that’s too small can stunt your plants, while one that’s too large may hold too much moisture. Aim for a pot that gives your succulent just enough room to grow, with drainage holes to prevent waterlogging.
Next, think about pot material. Terracotta pots are popular because they’re porous, allowing air and moisture to escape, which is perfect for succulents. On the other hand, ceramic and plastic pots come in various designs and colors, making them fun choices, too! Just verify they have drainage holes. With the right pot, your succulents will thrive beautifully!
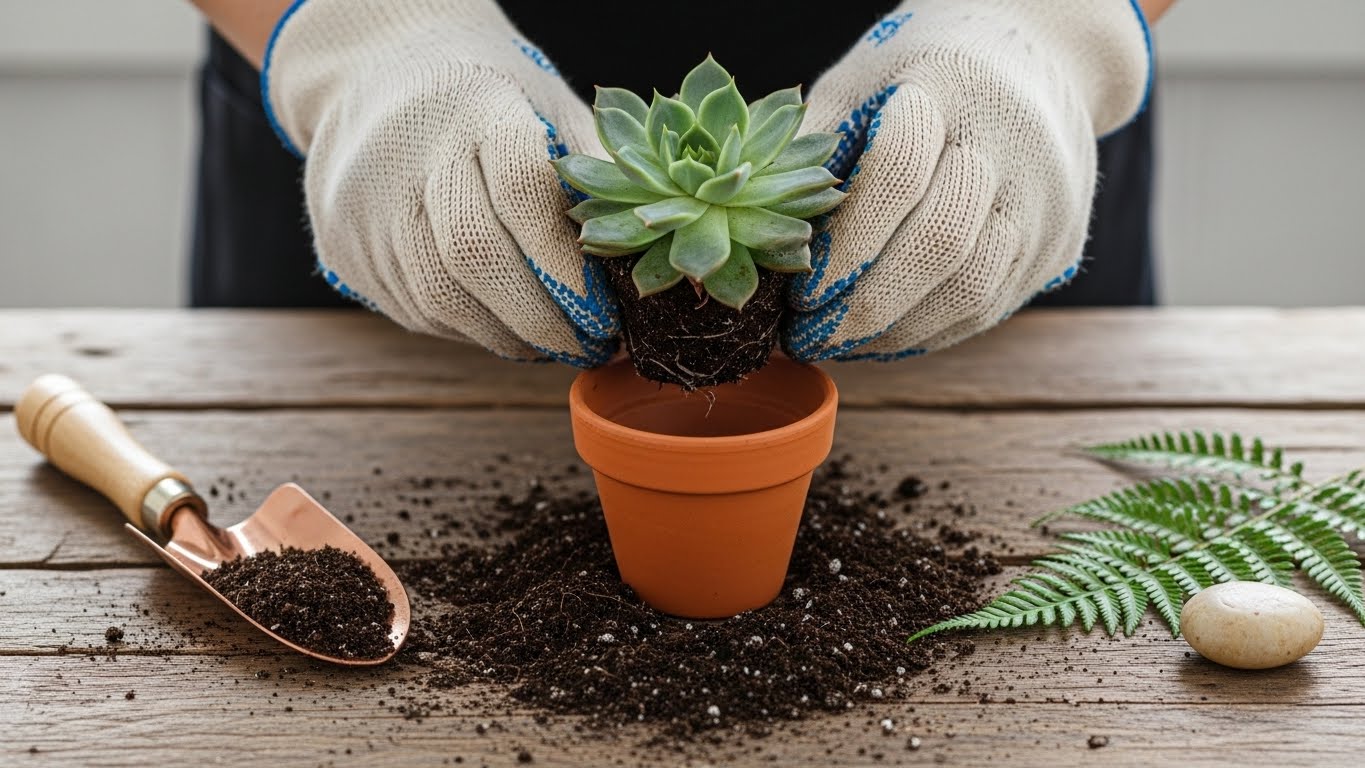
Step-by-Step Repotting Process
Repotting your succulents can be a fun and fulfilling project, and following a clear step-by-step process makes it easy! First, gather your repotting tools: a new pot, fresh soil, and a small trowel. Carefully remove your succulent from its old pot, gently loosening the roots if needed. Next, check for any dead or damaged roots and trim them away. Now, place a layer of soil in the new pot, set your succulent in the center, and fill in around it with more soil, making sure it’s snug but not too tight. Water it lightly, ensuring the soil settles. Finally, give your succulent some time to adjust before placing it back in its favorite spot. Enjoy your beautiful succulent varieties!
Aftercare Tips for Your Repotted Succulent
Once you’ve successfully repotted your succulent, the real fun begins with giving it the right aftercare to help it thrive in its new home. Start by carefully monitoring its water requirements. Allow the soil to dry out completely before watering again, as succulents prefer a good drought between drinks. Next, consider its light exposure. Place your succulent in a spot where it can bask in bright but indirect sunlight, ensuring it gets the energy it needs without burning its leaves. Keep an eye on its growth and adjust its position if needed. By providing the right care, you’ll help your succulent flourish, creating a beautiful, vibrant addition to your space. Enjoy your new botanical buddy!
Conclusion
Repotting your succulent isn’t just a chore; it’s like giving your plant a fresh start! By recognizing the signs it needs a new home, choosing the right soil and pot, and following the simple steps we discussed, you’ll help your succulent thrive. Remember, a well-cared-for plant can flourish into a vibrant centerpiece, bringing life to any space. So, roll up your sleeves, get your hands a little dirty, and watch your succulent grow strong and healthy!