When your plant outgrows its pot, look for signs like cramped roots and yellowing leaves. These mean it’s time for a repotting! First, choose a pot that’s 1-2 inches larger and has drainage holes. Gently loosen the roots and transfer the plant into fresh, well-draining soil. After repotting, keep the soil slightly moist and place your plant in bright, indirect light. With proper care, it’ll thrive in its new home! You’ll discover more essential tips ahead.
Signs Your Plant Needs Repotting
💡 Repotting is crucial when your plant outgrows its pot. This guide will ensure you do it without harming the roots.
➜ Get the step-by-step guide
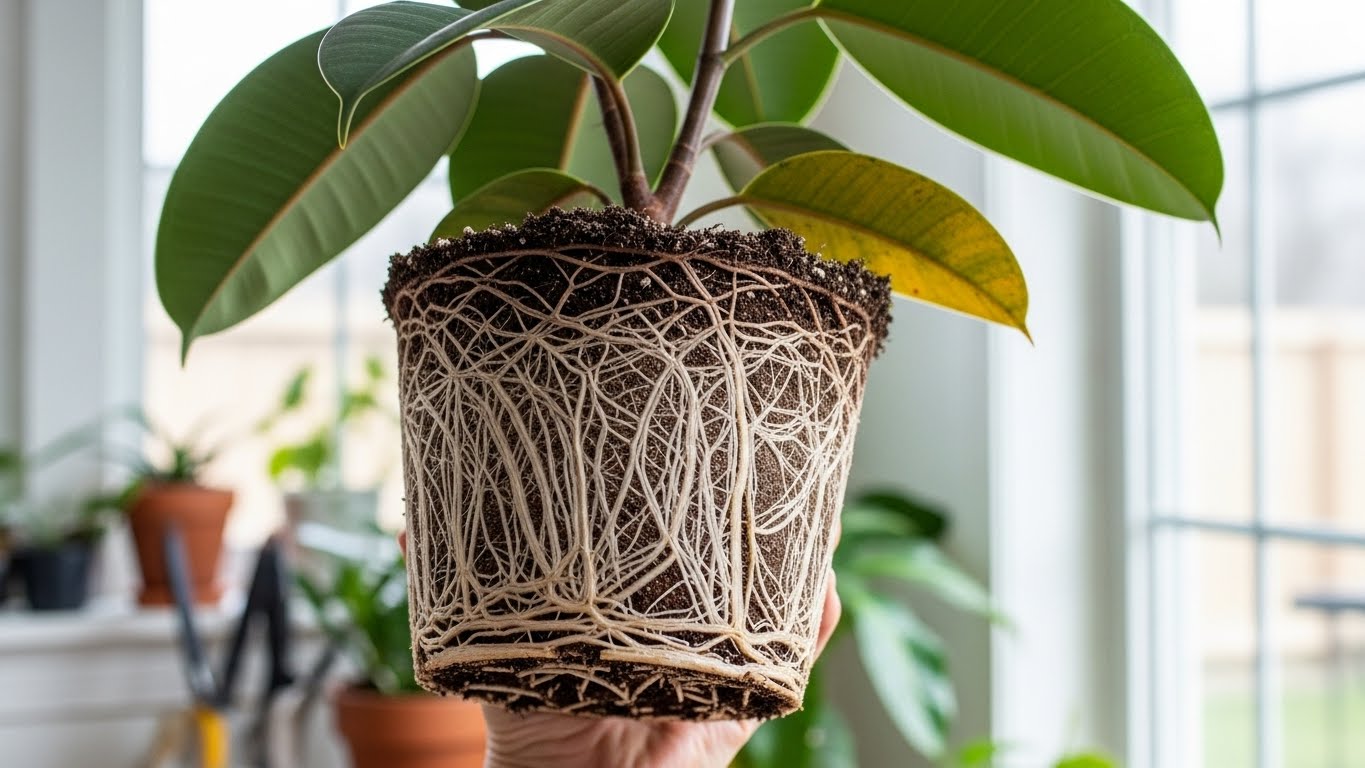
When you notice your plant looking a bit cramped, it’s likely a sign that it needs repotting. Check the pot size; if roots are growing out of the drainage holes or circling around the surface, it’s time for a change. Healthy roots are essential for your plant’s overall well-being, and a snug pot can restrict their growth, leading to root rot or stunted growth. You might also see yellowing leaves or slow growth, which could indicate your plant’s struggling for nutrients. Think of repotting as a fresh start, giving your green friend room to breathe and thrive. Don’t worry, with the right care, your plant will bounce back, flourishing in its new home!
Choosing the Right Pot and Soil
Choosing the right pot and soil is essential for your plant’s health and happiness. Start by selecting a pot made from suitable materials like clay, plastic, or ceramic. Each has its perks: clay pots allow for better airflow, while plastic pots are lightweight and retain moisture.
Don’t forget about drainage holes! They prevent water from pooling at the bottom, ensuring your plant’s roots won’t drown. If you can’t find a pot with holes, consider drilling some yourself.
For soil, choose a well-draining mix that suits your plant type, whether it’s cactus mix for succulents or a general-purpose potting soil for leafy plants. With the right pot and soil, your plant will thrive, and you’ll both be happier!
Preparing Your Plant for Repotting
Preparing your plant for repotting is an exciting step in its growth journey. To guarantee your plant’s health and happiness, consider timing considerations. Early spring is often the best time to repot, as your plant is waking up from dormancy.
Here’s a quick reference table to help you prepare:
💡 After repotting, your plant will need the right nutrients to thrive. Discover how to fertilize effectively for optimal growth.
➜ Discover proven techniques
Step | What to Do | Why It Matters |
|---|---|---|
Check roots | Look for root-bound conditions | Healthy roots support growth |
Water lightly | Moisten the soil before repotting | Reduces transplant shock |
Inspect leaves | Look for pests or diseases | Healthy foliage promotes robustness |
Taking these steps will set your plant up for success in its new home, allowing it to thrive and flourish as it continues to grow.
Step-by-Step Repotting Process
Repotting your plant can be a rewarding experience, and following a clear step-by-step process makes it easier than you might think. Here are three essential repotting techniques to guide you:
- Choose the Right Pot: Select a pot that’s 1-2 inches larger in diameter. This gives your plant room to grow without overwhelming it.
- Prepare Fresh Soil: Use a high-quality potting mix that promotes healthy plant growth. A well-draining mix keeps roots happy and prevents rot.
- Gently Transfer Your Plant: Carefully remove your plant from its old pot, loosening the roots if they’re cramped. Place it in the new pot, fill with soil, and water thoroughly.
Following these steps will help guarantee your plant thrives in its new home, setting the stage for continued growth!
Post-Repotting Care
After you’ve successfully repotted your plant, the next step is to give it some extra love and care as it settles into its new home. Start by adjusting its watering schedule; keep the soil slightly moist but not soggy. This helps your plant recover and establish its roots in the new pot. Pay attention to its light requirements too; most plants prefer bright, indirect light after a repotting. Avoid direct sunlight for a week or two, as this can stress your plant. Keep an eye out for any signs of distress, like wilting or yellowing leaves, and respond quickly. With your attention and care, your plant will thrive in its new environment, ready to grow even bigger!
Tips for Preventing Future Root-Bound Issues
To keep your plant from becoming root-bound again, it’s important to be proactive in its care. Focus on maintaining good root health and guaranteeing proper pot drainage, which can make all the difference. Here are three tips to help you:
- Choose the Right Pot Size: Make sure to use a pot that offers enough space for your plant to grow. A pot that’s too small will restrict its roots.
- Check Drainage Holes: Always guarantee your pot has adequate drainage holes. This prevents water from pooling, which can damage roots.
- Repot Regularly: Keep an eye on your plant’s growth and repot every 1-2 years to give it fresh soil and more room to thrive.
Conclusion
Now that you know how to repot your plant, imagine watching it thrive in its new, spacious home, roots stretching and leaves unfurling like a green umbrella soaking up sunlight. By keeping an eye out for signs of overcrowding and following the steps we discussed, you’ll help your plant flourish. With a little care and attention, it’ll reward you with vibrant growth and beauty, transforming your space into a lively oasis. Happy gardening!
💡 If your plant is showing signs of distress after repotting, it’s essential to know about root rot. Explore advanced methods to identify and recover from this issue.
➜ Explore advanced methods


