
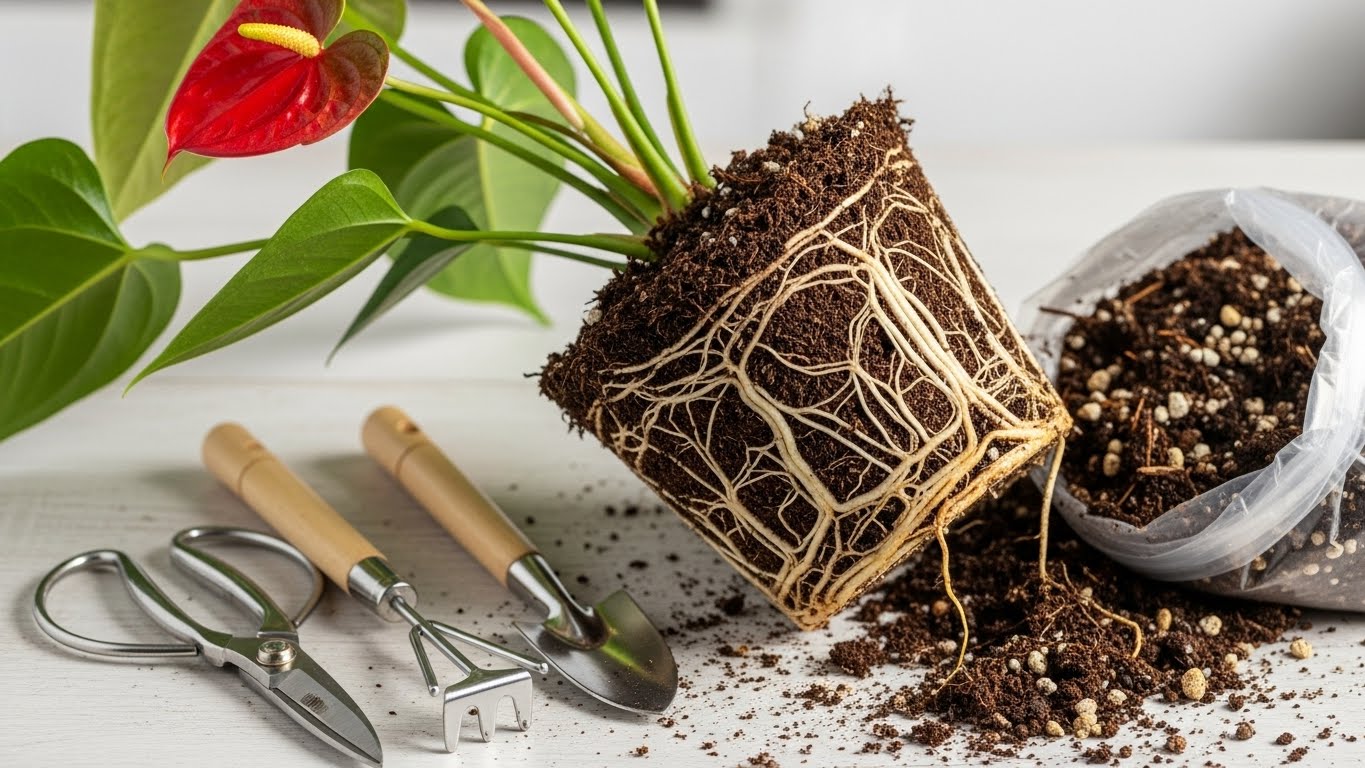
To repot an Anthurium without damaging its roots, start by selecting a pot that’s 1-2 inches larger. Carefully remove the plant and gently untangle any bound roots. Trim any damaged sections, then add fresh potting mix to the bottom of the new pot. Position the plant, fill in with more mix, and water it well. Keep an eye on care requirements, like light and moisture. If you’re curious about the whole process, there’s more to discover!
Key Takeaways
💡 Choosing the right soil is crucial for your Anthurium’s health.
➜ Discover the perfect soil blend
- Gently loosen bound roots by carefully pulling the plant from its pot, avoiding sudden movements.
- Use clean, sharp scissors to trim any damaged or rotten roots before repotting.
- Choose a new pot that is 1-2 inches larger in diameter to provide adequate space for growth.
- Start with a layer of well-draining potting mix at the bottom of the new pot for root health.
- Water the plant thoroughly after repotting to help settle the soil and hydrate the roots.
Signs Your Anthurium Needs Repotting
When you notice your Anthurium looking a bit cramped or unhealthy, it might be time for a repotting adventure! One major sign to look for is root bound roots. If you see roots poking out of the drainage holes or spiraling around the pot, your plant is telling you it needs more space. Another clue is growth stunted; if your Anthurium isn’t producing new leaves or flowers, it’s struggling. You might also notice yellowing leaves or wilting, which could indicate that it’s not getting the nutrients it craves. Keep an eye on your plant’s overall health, and trust your instinct. With a little love and attention, you’ll help it thrive again! Additionally, repotting every 1-2 years or when root-bound prevents root rot and ensures continued healthy growth.
Choosing the Right Pot and Soil
Choosing the right pot and soil for your Anthurium is essential, as it can greatly impact your plant’s health and growth. Start by selecting a pot size that allows for some room; a pot that’s one or two inches larger in diameter than the current one is ideal. This gives your Anthurium space to grow without being cramped.
For soil type, aim for a well-draining mix. You can use a blend of peat moss, orchid bark, and perlite to create the perfect environment. This mix keeps the roots happy, ensuring they get enough air while retaining moisture. By choosing the right pot and soil, you’re setting your Anthurium up for success, and that’s something to celebrate!
Preparing for the Repotting Process
💡 Repotting can sometimes lead to root issues if not done carefully.
➜ Learn how to prevent root rot
Before you plunge into repotting your Anthurium, it’s important to gather all the necessary supplies and create a comfortable workspace. Start with tool preparation; make sure you have a clean potting mix, a new pot, scissors, and gloves ready to go. It’s a good idea to have a small trowel or spoon handy for scooping. Next, focus on workspace organization—clear a flat surface, like a table, where you can spread out your materials. Lay down newspaper or a tarp to catch any soil spills. This organized setup not only keeps everything within reach but also makes the process smoother and more enjoyable. You’re setting the stage for a successful repotting experience, so take your time to get it right!
Step-by-Step Repotting Instructions
Repotting your Anthurium can be a rewarding experience, and with a few simple steps, you’ll have your plant thriving in no time. First, choose a pot that’s one size larger; this helps maintain root health by giving them room to grow. Carefully remove your Anthurium from its current pot, gently loosening the roots if they’re bound. Inspect the roots for any damage or rot, trimming away unhealthy sections. Place a layer of fresh potting mix at the bottom of the new pot, then position your plant, ensuring the roots spread out comfortably. Fill in around the roots with more potting mix, firming it gently without compacting it too much. Water the plant well, and you’re done!
Post-Repotting Care and Maintenance
Once you’ve successfully repotted your Anthurium, it’s important to give it the right care so it can adjust and thrive in its new environment. Start by ensuring it gets the proper light conditions; bright, indirect sunlight is ideal. Keep an eye on its water requirements, allowing the top inch of soil to dry out between waterings to prevent root rot.
- Mist the leaves occasionally to maintain humidity.
- Fertilize every 4-6 weeks with a balanced fertilizer to boost growth.
- Monitor for any signs of stress, like wilting or yellowing leaves.
With a little attention, your Anthurium will flourish, rewarding you with its stunning blooms and vibrant foliage. Enjoy nurturing this beautiful plant!
Conclusion
Repotting your anthurium is like giving it a new pair of shoes—sometimes, it just needs a little more room to grow! By following the steps outlined, you can guarantee your plant flourishes without damaging its roots. Remember to choose the right pot and soil, and give it some extra love after the process. With a bit of care, your anthurium will thrive and reward you with its stunning blooms for years to come!
💡 After repotting, you may notice changes in your plant’s leaves.
➜ Explore solutions for leaf discoloration


