Living in an apartment often means a constant negotiation between the desire to create a personal, vibrant sanctuary and the constraints of a rental agreement. The dream of a lush, green wall—a living tapestry of foliage that purifies the air and calms the soul—can feel out of reach, shadowed by the fear of wall damage, lost security deposits, and permanent alterations. But what if that vertical oasis was not only possible but entirely damage-free?
This guide serves as the definitive blueprint for the modern renter. It moves beyond simple hacks to provide three distinct, meticulously detailed, and fully reversible build paths for creating a stunning DIY plant wall for apartments. Whether the project involves a robust floor-to-ceiling grid, a delicate gallery of trailing vines, or a flexible freestanding jungle, each method is designed to be assembled without a single drill hole. This report outlines not just the construction but the complete strategy: from navigating the landlord conversation and assessing the space to cultivating a thriving vertical ecosystem and, finally, ensuring a clean, damage-free move-out.
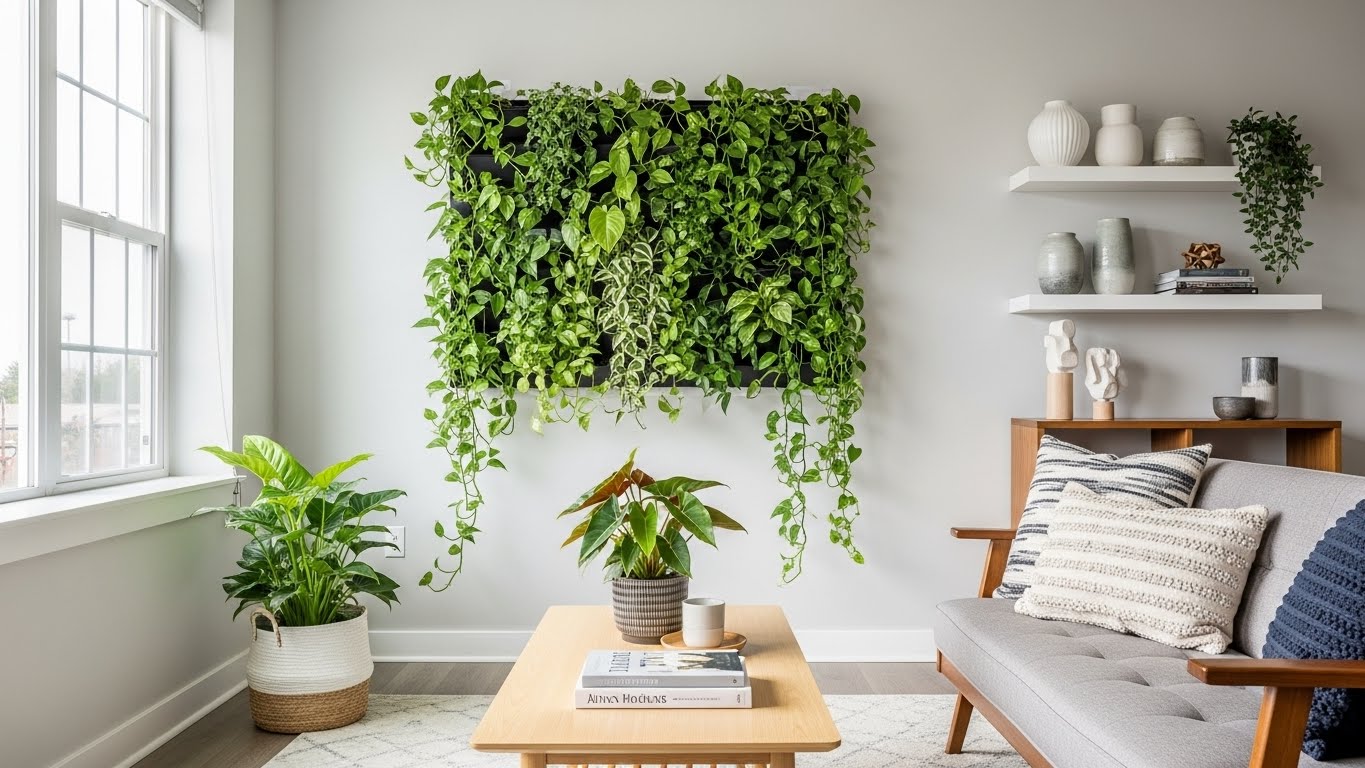
💡 If you’re looking for ways to decorate your rental without damaging the walls, this article is a must-read.
➜ Discover proven techniques
The Foundation: Strategic Planning for Renter Success
A successful and stress-free vertical garden is built on a foundation of careful planning long before any assembly begins. For a renter, this planning phase is paramount, ensuring the project respects the property, complies with the lease, and is fundamentally safe.
The Landlord Dialogue: Turning a Hurdle into an Asset
The conversation with a landlord or property manager should not be viewed as a request for permission but as a presentation of a professional, well-considered plan. This proactive approach demonstrates responsibility and a respect for the property, significantly increasing the likelihood of a positive outcome.
First, a thorough review of the lease agreement is essential. Clauses related to alterations, wall hangings, load-bearing limits, and liability for water damage must be identified and understood. Rather than asking a vague question like, “Can I put up a plant wall?”, which may invite a default “no,” a more strategic pitch is recommended. Frame the project by emphasizing its temporary and non-invasive nature. Key phrases to use include: “freestanding decorative feature,” “no drilling or permanent mounting required,” “utilizes a tension-based system,” and “incorporates integrated floor and wall protection.”
Before any installation, it is critical to document the existing condition of the space. Take clear, well-lit “before” photos of the chosen wall, floor, and ceiling. Any pre-existing scuffs, marks, or imperfections should be noted. Finally, get any agreement or acknowledgment from the landlord in writing, even a simple email confirmation. This documentation is an invaluable asset for protecting the security deposit upon moving out.
Site Assessment: Reading Your Space Like a Pro
The long-term health of an indoor plant wall is determined by its environment. A careful assessment of the chosen location is a prerequisite for success.
- Light Mapping: The availability of natural light is the most critical factor. The path of the sun should be tracked throughout the day to determine if the location receives low, medium, or bright indirect light. A south-facing window provides bright light for much of the day, while a north-facing window offers lower, more consistent light. This assessment directly informs plant selection and dictates whether supplemental lighting, such as a grow light bar, will be necessary.
- Wall & Floor Integrity: The condition of the surfaces is crucial. For any method involving pressure or adhesives, the wall must be sound. Plaster walls may be more fragile than modern drywall. The effectiveness of adhesive hooks is significantly reduced on textured, peeling, or damp surfaces. The floor must be level to ensure the stability of tension pole systems or freestanding shelves.
- Moisture & Airflow Audit: Areas with high humidity, such as bathrooms or kitchens, or spots near windows prone to condensation, present a risk of mold or mildew. Good air circulation is necessary to mitigate this risk. A small fan can be a useful addition to ensure air movement around dense foliage.
Safety by Design: The Non-Negotiables
A beautiful plant wall is a liability if it is not structurally sound and safely integrated into the living space.
- Load Calculation: The most common point of failure for DIY plant walls is underestimating the total weight. Soil becomes significantly heavier when watered. A simple formula can provide a safe estimate of the total load:TotalWeight=∑(Weightpot+Weightdrysoil+Weightplant+Weightwater)As a rule of thumb, one liter of water adds approximately 2.2 lbs (1 kg) of weight. This calculation is essential for selecting a support system with an adequate safety margin, especially when using tension-based or adhesive solutions.
- Egress and Accessibility: A plant wall must not obstruct pathways, fire exits, or the full operation of windows and doors. Clear egress is a fundamental safety requirement in any dwelling. The installation should also allow for practical access for watering and plant maintenance.
- Electrical Safety: If grow light bars are used, cord management is a key safety consideration. Cords should be secured to prevent trip hazards, and timers or power strips must be placed where they cannot be exposed to water drips from watering.
The Blueprints: Three Paths to Your Indoor Oasis
With a solid plan in place, the next step is to choose a build path. The following three blueprints offer distinct aesthetics, functionalities, and budget levels, all while adhering to the core principle of being 100% renter-friendly.
Blueprint 1: The High-Impact Tension-Pole Grid
This method is the most robust and visually dramatic, creating a floor-to-ceiling focal point. It utilizes tension pole shelving to support a wire grid, making it ideal for larger plant collections and heavier pots without any wall contact.
- Shopping List & Analysis
- Poles: The critical component is the tension pole itself. While standard shower or curtain tension rods are often used in DIY projects, their weight capacity is typically limited to 20-30 lbs, which is dangerously insufficient for a multi-plant display. It is strongly recommended to invest in heavy-duty, purpose-built plant poles or storage tension rods, which can have capacities ranging from 100 to over 170 lbs.
- Grid Panel: Commercial-grade wire gridwall panels, available from store fixture suppliers, are strong, versatile, and relatively inexpensive. A 2 ft x 6 ft panel typically costs between $25 and $40.
- Fasteners: Heavy-duty zip ties or reusable gear ties provide a secure way to attach the grid to the poles ($10).
- Accessories: S-hooks, clip-on baskets, and pot hangers ($15+).
- Estimated Total Cost: $95 – $200+
- Estimated Build Time: 45-60 minutes
- Step-by-Step Build Guide
- Assemble the tension poles according to the manufacturer’s instructions. Position them in the desired location and extend them until they are firmly and securely wedged between the floor and ceiling. Use a level to ensure they are perfectly vertical.
- Hold the wire grid panel against the poles. Starting from the top, use heavy-duty zip ties to lash the grid to the poles. Work downwards, adding ties every 12-18 inches on both sides, ensuring the grid is level and taut.
- Trim the excess ends of the zip ties for a clean look.
- Use S-hooks and other hangers to arrange the plants on the grid. Distribute the weight logically: place the heaviest plants lower down and closer to the poles for maximum stability.
Blueprint 2: The Versatile No-Drill Rail & Hook Gallery
💡 Creating a stunning focal wall can elevate your plant wall project. This guide offers practical steps to achieve that.
➜ Get the step-by-step guide
This approach is lighter, more minimalist, and highly customizable. It is perfect for creating a floating gallery of smaller, trailing plants using no drill planters hung from a rail mounted with high-strength adhesive hooks.
- Shopping List & Analysis
- Adhesive Mounts: Select heavy-duty adhesive hooks with a weight capacity of at least 5 to 7.5 lbs each, such as those from the Command brand. The success of this method hinges entirely on the quality of the adhesive and the condition of the wall surface. This method is not recommended for humid environments or textured walls.
- Rail: A lightweight metal curtain rod, a bamboo pole, or a wooden dowel can serve as the rail ($10-$20).
- Hangers: S-hooks, macrame plant hangers, or lightweight pots with built-in hooks ($20+).
- Estimated Total Cost: $45 – $65+
- Estimated Build Time: 30 minutes (plus adhesive curing time)
- Step-by-Step Build Guide
- Identify the desired location for the rail. Clean the wall surface at the points where the hooks will be placed with isopropyl alcohol and allow it to dry completely. This step is critical for a strong bond.
- Following the manufacturer’s instructions, apply the adhesive strips to the back of the hooks, then press each hook firmly against the wall for at least 30 seconds. Use a level to ensure the hooks are perfectly aligned.
- Wait for the adhesive to cure. This period is typically at least one hour but can be longer. Do not skip this step.
- Gently place the rail onto the hooks.
- Hang the plants using S-hooks or macrame hangers. Be meticulous about not exceeding the total weight capacity of the hooks. A 4-inch plastic pot with moist soil typically weighs 2-3 lbs.
Blueprint 3: The Freestanding Modular Oasis
💡 Struggling to maintain a cohesive look with your plant wall? This article shows how to blend real and artificial plants seamlessly.
➜ Master this approach
For the renter who prioritizes ultimate flexibility and zero wall impact, a freestanding system is the ideal solution. This vertical garden indoor is built using modular, stackable shelves that can be easily assembled, reconfigured, and moved.
- Shopping List & Analysis
- Shelving Unit: Options range from affordable wire cube organizers to more decorative tiered or ladder-style plant stands. Wire cube shelving is surprisingly robust, with individual cube capacities often ranging from 10 lbs to over 50 lbs for heavy-duty models.
- Accessories: Drip trays for each shelf are essential for water management ($20). This setup is also the easiest to equip with grow light bars, which can be attached to the underside of each shelf ($30-$60 per bar).
- Estimated Total Cost: $60 – $300+ (cost varies significantly with the inclusion of grow lights)
- Estimated Build Time: 30-90 minutes (depending on the complexity of the shelving unit)
- Step-by-Step Build Guide
- On a level surface, assemble the modular shelving unit according to the manufacturer’s instructions. A rubber mallet is often included or recommended.
- For wire cube systems, use the included connectors. For added rigidity and safety, consider reinforcing the connections with zip ties.
- Place a waterproof drip tray on each shelf that will house plants.
- Arrange the plants on the shelves, always placing the heaviest pots on the bottom tier to lower the center of gravity and increase stability.
- If using grow lights, attach the light bars to the underside of each shelf using zip ties or the hardware provided, ensuring they illuminate the plants on the shelf below.
Strategic Analysis: Choosing Your Ideal Build
The optimal build path depends entirely on individual circumstances, including budget, available space, DIY comfort level, and the scale of the desired plant collection. The following table provides a direct comparison to aid in this decision-making process.
Feature | Blueprint 1: Tension-Pole Grid | Blueprint 2: Adhesive Rail | Blueprint 3: Modular Shelves |
Tools Required | None | Level, Rubbing Alcohol | Mallet (often included) |
Build Complexity | ★☆☆☆☆ (Very Low) | ★★☆☆☆ (Low) | ★☆☆☆☆ (Very Low) |
Est. Cost (Base) | $95 – $200 | $45 – $65 | $60 – $150 |
Weight Capacity | High (50-150+ lbs) | Low (10-20 lbs total) | Medium to High (10-50 lbs per shelf) |
Wall Impact | Zero (pressure marks possible) | Very Low (paint peel risk) | Zero |
Light Suitability | Good (can be placed anywhere) | Fair (often near windows) | Excellent (easy to add grow lights) |
Best For… | Large collections, heavier plants | Small, trailing plants, tight budgets | Maximum flexibility, renters who move often |
Cultivating Your Vertical Ecosystem
Building the structure is only the first step. A thriving plant wall is a small, interdependent ecosystem where water, light, and plant life must be managed in harmony.
Precision Water Management: Beyond the Watering Can
Water is the source of life for the plant wall but also the single greatest risk to a renter’s security deposit. Proactive water management is non-negotiable.
- Containment: The first line of defense is a physical barrier. Every pot on a shelf must have a drip tray or saucer. For grid systems, a larger, collective tray can be placed at the base to catch any runoff. For added protection, a thin, clear vinyl sheet can be attached to the wall behind the lower section of a grid to shield it from splashes and humidity.
- Capillary Mats: For shelving systems with multiple small pots, a capillary mat is an advanced solution. This absorbent fabric mat sits in a tray of water, wicking moisture up to the bottom of the pots. This provides consistent, gentle hydration and reduces the risk of overwatering.
- Self-Watering Planters: Though a more significant investment, self-watering planters with built-in reservoirs are an excellent way to contain water, reduce the frequency of watering, and provide plants with a steady supply of moisture.
Illumination Science: A Renter’s Guide to Grow Lights
To ensure plants flourish in any location, regardless of natural light, an understanding of supplemental lighting is crucial.
- Grow Light Basics: Plants require light from the full spectrum to photosynthesize effectively. Modern full-spectrum LED grow light bars are energy-efficient and produce very little heat, making them safe for indoor use. The key metric for plant growth is the Daily Light Integral (DLI), which is the total amount of light a plant receives over a 24-hour period.
- Spacing is Critical: The distance between the light source and the plant foliage is vital. Placing a light too close can burn the leaves, while placing it too far away renders it ineffective. A general rule for common LED bars is to maintain a distance of 6 to 12 inches for lower-wattage lights (10-20W) and 12 to 24 inches for more powerful lights.
- The Power of Timers: Consistency is key. Plants have a circadian rhythm and require a regular cycle of light and dark. A simple, inexpensive outlet timer ($10-$15) is an essential tool. It ensures the plants receive a consistent 12 to 16 hours of light per day, promoting healthy, steady growth.
Curating Your Green Wall: Plant Selection & Design
The final step is populating the structure with life. The right plants will not only survive but thrive in a vertical setting.
- Best Plants for Vertical Gardens: For a lush, cascading effect, trailing plants are the top choice. Proven, low-maintenance varieties include Golden Pothos (Epipremnum aureum), Heartleaf Philodendron (Philodendron hederaceum), Spider Plant (Chlorophytum comosum), and English Ivy (Hedera helix). For a full list of compact options, see our guide to [/decor/small-apartment-plants/]. The best candidates for this are vining species, detailed in our deep dive on [/types/trailing/] plants. For upright plants on shelves, famously forgiving options like Snake Plants (Dracaena trifasciata) and ZZ Plants (Zamioculcas zamiifolia) are excellent choices. Ensure they have the right foundation with our [/the-ultimate-potting-soil-container-guide/], and master their hydration needs by reviewing [/watering-houseplants-101/].
- Vertical Design Principles: Apply the classic “Thriller, Filler, Spiller” concept to the wall. Use a striking upright plant as a “thriller,” bushy plants as “fillers,” and long vines as “spillers.” Create visual interest by mixing foliage textures—the delicate fronds of a fern against the bold leaves of a philodendron—and colors, such as the chartreuse variegation of a ‘Brasil’ Philodendron next to the deep green of an ivy.
The Exit Strategy: A Damage-Free Move-Out
The ultimate test of a renter friendly plant wall is its disassembly. The goal is to leave the apartment in the exact condition it was found, ensuring a full security deposit return.
- Disassembly: Carefully reverse the installation steps for the chosen build path. Remove plants first, then hangers, and finally the main structure.
- Wall Restoration: For the adhesive rail system, proper removal of the hooks is critical. Do not pull the hook away from the wall. Instead, slowly stretch the adhesive tab straight down, parallel to the wall, until the hook releases. This technique breaks the bond without peeling paint or damaging the drywall.
- Final Inspection: After removing a tension pole system, wipe down the floor and ceiling to remove any pressure marks or dust. For all systems, conduct a final inspection of the wall and compare its condition to the “before” photos taken during the planning phase.
Conclusion
The creation of a living, breathing plant wall is well within the reach of any apartment renter. Through strategic planning, careful selection of a damage-free system, and a holistic approach to cultivation, a vertical garden can transform a temporary residence into a true home. By prioritizing safety, respecting the property, and communicating effectively, renters can confidently embrace this impactful design feature, knowing that their green oasis can be enjoyed today and cleanly removed tomorrow. The result is a space that is not only more beautiful and personalized but also healthier and more serene—a testament to the transformative power of bringing nature indoors.
💡 Indoor plants can serve multiple purposes, including acting as natural dividers in your space. Explore how to maximize their potential.
➜ Explore advanced methods


