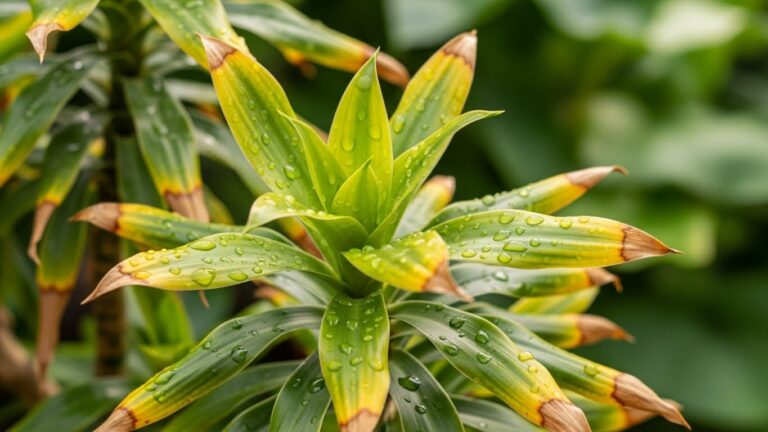
To repot your Dracaena without harming its roots, start by watering it a day before. Choose a new pot that’s 1-2 inches bigger, with drainage holes. Gently wiggle the pot to loosen the roots, then tip it sideways to slide the plant out carefully. Check for any damaged roots and prune them if needed. Finally, replant it with fresh potting mix, and give it a light watering. There’s much more to explore about caring for your Dracaena!
Key Takeaways
💡 Choosing the right potting mix is crucial for your Dracaena’s health.
➜ Discover proven techniques
- Water the Dracaena a day before repotting to soften the soil and ease root removal.
- Firmly hold the base of the plant to prevent stem breakage during the process.
- Gently wiggle the pot to loosen roots from the edges before tipping it sideways.
- Slide the plant out carefully to minimize root disturbance and avoid tearing.
- Use a sharp knife to prune any damaged roots, ensuring clean cuts for healing.
When to Repot Your Dracaena
Repotting your Dracaena is an exciting opportunity to give your plant a fresh start, and knowing when to do it can make all the difference! Look for signs needing your attention, like roots poking through the drainage holes or stunted growth. These signals often mean your plant has outgrown its pot and needs more space to thrive. Seasonal considerations play a vital role, too; spring is the ideal time for repotting when your Dracaena’s growth kicks into high gear. During this period, your plant’s energy is focused on growth, making it more resilient to the stress of repotting. Additionally, Dracaenas are known for their air-purifying abilities, so repotting can also improve the overall health of your indoor environment. So, keep an eye on your Dracaena, and you’ll be ready to give it the upgrade it deserves!
Choosing the Right Pot and Soil
When you’re ready to give your Dracaena a new home, choosing the right pot and soil is vital for its success. Start with the pot size; it should be about 1-2 inches larger than the current one. This gives the roots room to grow without being too spacious, which can lead to overwatering.
Next, consider the soil type. A well-draining mix is important to keep your plant healthy. Here are some things to keep in mind:
A well-draining soil mix is essential for keeping your Dracaena healthy and thriving.
- Choose a pot with drainage holes to prevent water buildup.
- Use a lightweight potting mix designed for houseplants.
- Consider using perlite or sand to enhance drainage.
- Make sure the pot is sturdy to support your Dracaena’s height.
Happy planting!
Preparing Your Dracaena for Repotting
Before you start repotting your Dracaena, it’s important to assess its health and choose the right pot. Check for any signs of stress, like yellowing leaves or root crowding, as these can help you decide what your plant needs. Once you know how your Dracaena is doing, you can select a pot that’s just the right size to give it a fresh start!
Assessing Plant Health
Evaluating your Dracaena’s health is an important step in the repotting process, as it helps guarantee your plant thrives in its new environment. Start by checking its overall plant vigor, and don’t forget to conduct a thorough root inspection. Here are some signs to look for:
- Yellowing leaves: Indicates potential overwatering or nutrient deficiency.
- Wilting: Suggests underwatering or root issues.
- Pest presence: Look for any unwanted visitors on leaves or in the soil.
- Root condition: Healthy roots should be white and firm, not mushy or brown.
Choosing Right Pot
Choosing the right pot for your Dracaena can make a huge difference in how well it adapts to its new home. First, consider the pot size; it should be only slightly larger than the current one, allowing room for growth without overwhelming the roots. Also, verify your pot has drainage holes to prevent water from pooling, which can harm your plant.
Pot Size | Recommended for | Benefits |
|---|---|---|
Small | Young Dracaenas | Less stress on roots |
Medium | Established plants | Balanced growth |
Large | Overgrown Dracaenas | More room for roots |
Extra Large | Special cases | Extra moisture retention |
Carefully Removing the Plant From Its Current Pot
💡 Selecting the right pot can make a significant difference in your plant’s growth.
➜ Get the step-by-step guide
When you’re ready to repot your dracaena, the first step is carefully removing it from its current pot. This process requires a gentle touch to guarantee root protection and avoid any damage. Here’s how you can do it:
- Water the plant a day before to soften the soil.
- Hold the base of the plant firmly, not the stems, to prevent breakage.
- Gently wiggle the pot to loosen the roots from the edges.
- Tip the pot sideways, allowing the plant to slide out without force.
Repotting Techniques to Protect Roots
When it comes to repotting your Dracaena, timing is everything, so make sure you pick a moment when the plant isn’t stressed. You’ll also want to gather the right tools, as having a sharp knife and a sturdy pot can make all the difference. Finally, be gentle when removing old soil to protect those delicate roots, ensuring your plant stays healthy and happy in its new home.
Choose Right Timing
Timing plays an essential role in the health of your Dracaena during repotting, as doing it at the right moment can greatly reduce stress on the plant’s roots. To guarantee ideal growth, aim for the best seasons to repot. This typically means spring or early summer, when your Dracaena is actively growing. Here are some key points to reflect on:
- Watch for new growth: Signs of fresh leaves indicate it’s time.
- Avoid dormancy: Don’t repot during winter when the plant rests.
- Check root health: If roots are circling, it’s a good sign to repot.
- Assess temperature: Aim for temperatures above 60°F (15°C) for the best results.
Choosing the right timing keeps your Dracaena happy and thriving!
Use Proper Tools
Using the right tools is essential for a successful repotting experience, and having three important items on hand can make all the difference in protecting your Dracaena’s delicate roots. First, a sharp, clean knife is perfect for applying pruning techniques, allowing you to trim any damaged roots without causing stress. Next, a sturdy trowel helps you handle the soil with care, ensuring you don’t disrupt the root system too much. Finally, don’t forget a moisture meter! Keeping an eye on soil moisture is key to prevent overwatering after repotting. By using these tools, you’ll feel more confident and connected to your plant, creating a nurturing environment for your Dracaena to thrive in its new home. Happy repotting!
Gentle Soil Removal
To guarantee your Dracaena thrives in its new pot, gently removing the old soil is an essential step that requires care and attention. You want to make certain the soil texture is just right for your plant’s new home. As you start, take a moment for root inspection to check for any damage or rot. Here’s how to do it:
- Use your fingers to gently loosen the soil around the roots.
- Tilt the pot and carefully tap to release the plant.
- Keep the roots moist to prevent stress during removal.
- Avoid pulling or yanking, as it can harm the delicate roots.
Post-Repotting Care for Your Dracaena
Once you’ve successfully repotted your Dracaena, the real fun begins with its post-repotting care! First, let’s talk about post-repotting watering. You’ll want to give your plant a nice drink, but don’t overdo it; just keep the soil slightly moist. Check it regularly, and water when the top inch feels dry to the touch.
Next up is post-repotting light. Place your Dracaena in a spot with bright, indirect sunlight. Avoid direct sun, as it can stress the plant after the move.
For the first few weeks, keep an eye on your plant and avoid fertilizing; it needs time to adjust. With a bit of love and attention, your Dracaena will thrive in its new home!
Conclusion
Repotting your Dracaena can feel a bit intimidating, but with the right steps, it’s totally manageable! Did you know that Dracaenas can grow up to 10 feet tall in the right conditions? That’s a lot of plant to care for! By choosing the right pot, being gentle with those roots, and giving it some TLC afterward, you’ll help your Dracaena thrive. So, roll up your sleeves and get ready to give your plant a fresh start—it’ll thank you for it!
💡 Fertilizing your Dracaena correctly after repotting can enhance its recovery.
➜ Master this approach