Repotting your begonia is simple and essential for its growth! Start by selecting a slightly larger pot with drainage holes. Prepare a well-draining soil mix using peat moss, perlite, and pine bark. Gently remove the plant from its old pot, inspecting its roots. Then, place the begonia in the center of the new pot, covering the roots with soil while leaving space at the top. Finally, water deeply and monitor your plant. Curious about more tips for success?
Key Takeaways
💡 Understanding when and how to fertilize your begonias is crucial for their growth.
➜ Master the fertilization schedule
- Check for signs of needing repotting, such as visible roots or stunted growth, before starting the process.
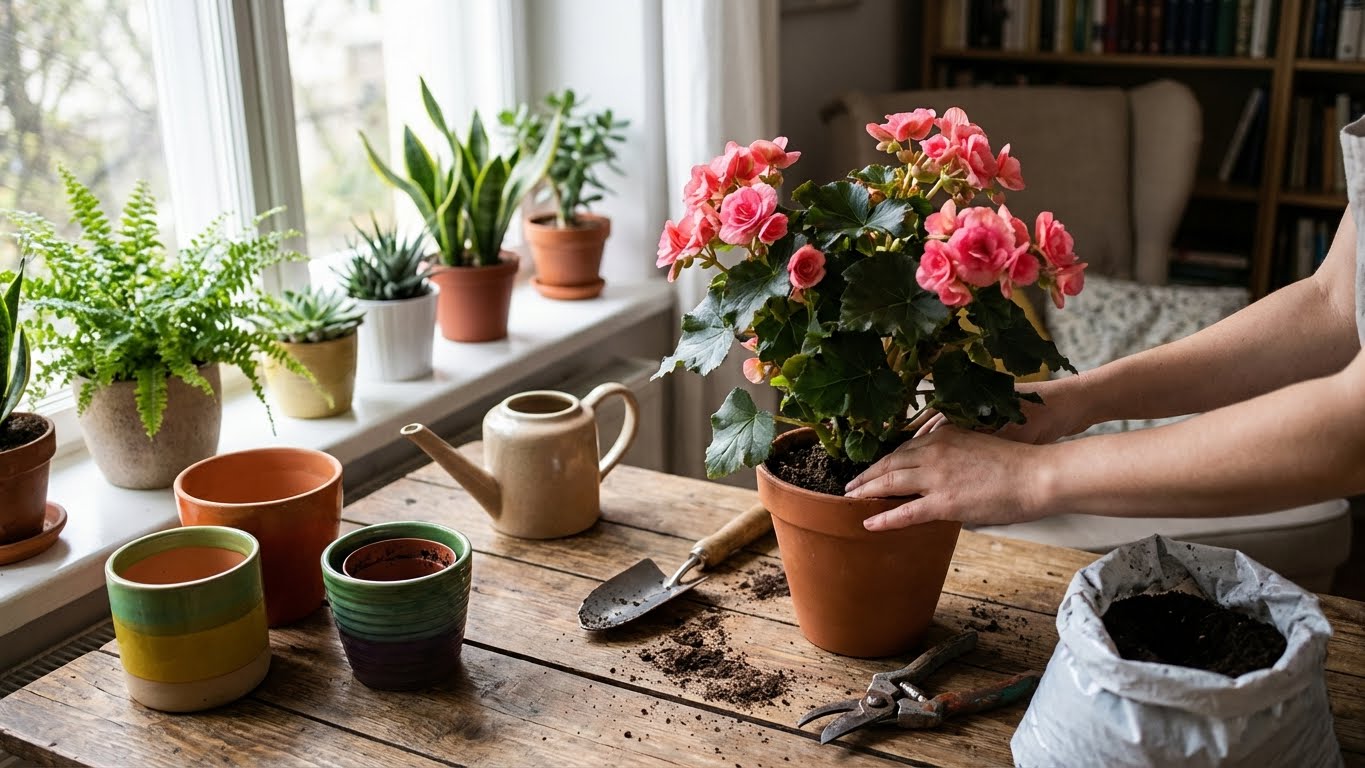
- Select a slightly larger pot with drainage holes and a suitable aesthetic to match your decor.
- Use a well-draining soil mix, ideally a blend of peat moss, perlite, and pine bark, for healthy growth.
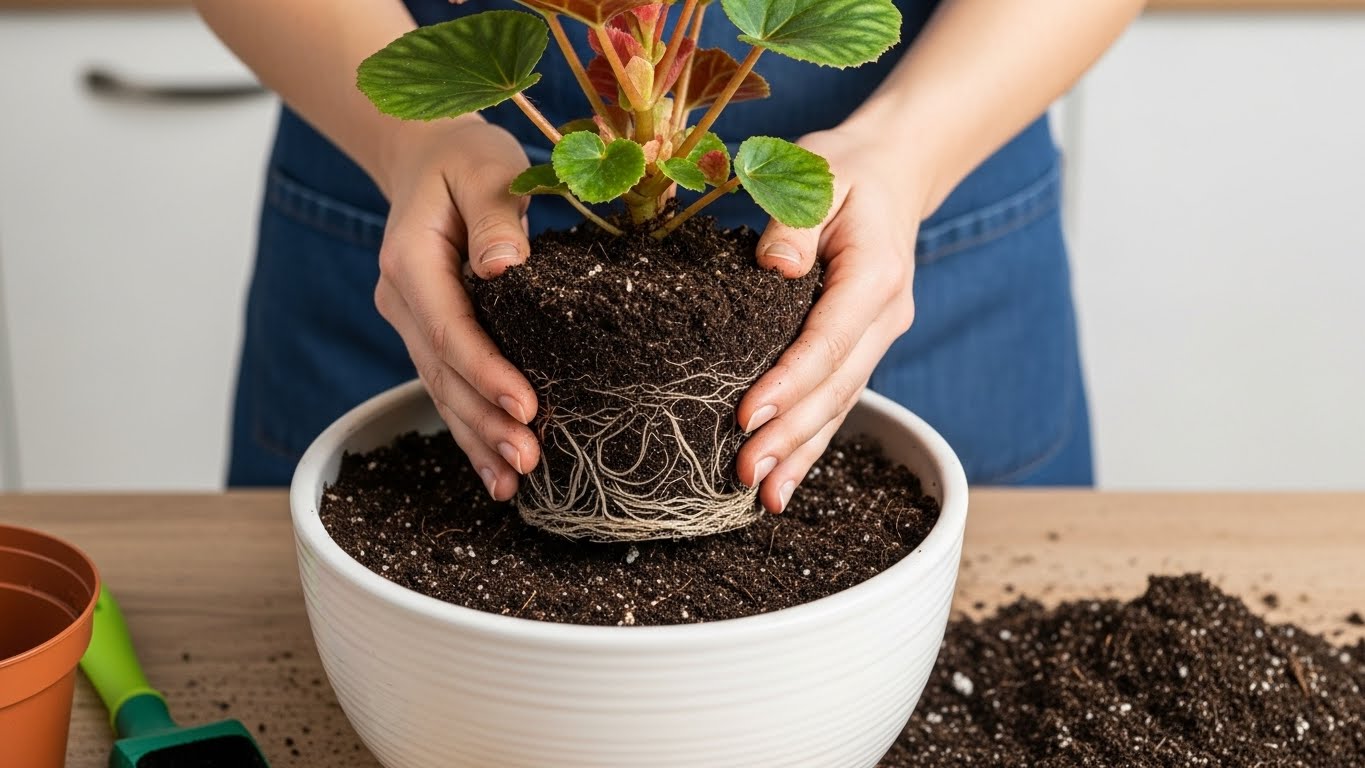
- Carefully remove the begonia, inspect roots, and position it centrally at the same depth in the new pot.
- Water thoroughly after repotting and monitor humidity and soil moisture regularly for optimal plant health.
Understanding When to Repot Your Begonia
When should you repot your begonia? You’ll want to keep an eye out for a few signs that indicate it’s time for a little change. If you notice roots poking out of the drainage holes or if your begonia’s growth seems stunted, it’s likely time to repot. Another sign is if the soil dries out quickly after watering; your plant might be outgrowing its home! Repotting not only gives your begonia more space to grow but also refreshes the soil, providing essential nutrients. Additionally, repotting should ideally be done every 1–2 years or when roots fill the pot, ensuring optimal soil pH levels for your plant. Remember, healthy begonia growth means happy blooms, so don’t hesitate to give your plant the extra love it needs by moving it to a larger pot when those signs appear. Your begonia will thank you!
Choosing the Right Pot
Choosing the right pot for your begonia is essential, and there are several factors to take into account that can make all the difference in your plant’s health. First, think about pot size; it should be just a bit larger than the current one. Next, make certain it has drainage holes to prevent root rot. Consider the material options too—ceramic, plastic, or terracotta each have their perks. Aesthetic appeal matters, too; pick a pot that matches your style. Finally, keep pot weight in mind; heavier pots can be more stable but may be tougher to move. Here’s a handy table to help you decide:
Factor | Considerations |
|---|---|
Pot Size | Slightly larger than current |
Drainage Holes | Essential for health |
Material Options | Ceramic, plastic, terracotta |
Aesthetic Appeal | Match your decor |
Selecting the Ideal Soil Mix
Selecting the right soil mix for your begonia is essential for its growth and overall health. Aim for a well-draining, lightweight mix that includes plenty of organic matter. A blend of peat moss, perlite, and pine bark works wonders, providing aeration while retaining moisture.
Make sure the soil pH stays between 6.0 and 6.5, which is perfect for begonias. You can test your soil pH with a simple kit from a garden center. This balance helps your begonia absorb the nutrients it needs. Remember, healthy soil translates to a happy plant!
Preparing Your Begonia for Repotting
Before you immerse yourself in repotting your begonia, it’s important to prepare both the plant and yourself for the task ahead. Start by giving your begonia a thorough pest inspection. Look for any signs of tiny critters or unusual spots on the leaves, as catching these early can save you a lot of trouble later. Next, consider a fertilizer application. This will give your plant a nutrient boost, ensuring it thrives in its new home. Gather your tools: a new pot, fresh soil, and your favorite watering can. Finally, find a comfortable workspace where you can focus. With everything in place, you’ll be ready to give your begonia the care it deserves as you commence on this exciting repotting journey!
Gently Removing Your Begonia From Its Current Pot
Before you can give your begonia a fresh new home, it’s important to set up your workspace, so you don’t make a mess. Start by loosening the soil around the edges of the pot, which helps the roots release easily. Remember to support the plant as you remove it, ensuring it stays upright and intact for its change!
Preparing Your Workspace
Gently removing your begonia from its current pot is an exciting step in the repotting process, and it’s essential to do it carefully to avoid damaging the plant. Before you begin, take a moment to prepare your workspace. Gather your essential tools, like gloves, scissors, and a clean surface to work on. Make sure everything’s organized; this will help you focus on your begonia without distractions. Clear away any clutter, placing everything you need within arm’s reach. Having a tidy workspace not only makes the process smoother but also protects your plant from any unnecessary stress. With your tools ready and your workspace organized, you’re set for the next stage of repotting your beloved begonia.
Loosening the Soil
Loosening the soil around your begonia is an essential part of the repotting process, as it helps to release the roots from their current confines without causing damage. To get started, gently massage the pot’s sides and tap the bottom to loosen the soil texture. Then, carefully grip the base of your plant and tilt it to slide it out. Keep an eye on the roots; they should come free without tearing. Good root health is important for your begonia’s growth, so take your time.
Action | Purpose | Tips |
|---|---|---|
Massage pot sides | Loosen soil texture | Use gentle pressure |
Tap the bottom | Release clumps | Avoid heavy impacts |
Tilt the plant | Slide out gently | Support the base firmly |
Supporting the Plant
When you’re ready to remove your begonia from its pot, it’s important to support the plant carefully to prevent any damage. Start by placing one hand at the base of the stem, cradling it gently while using your other hand to grip the pot. Tilt the pot slightly, allowing the soil to loosen further. With a gentle pull, ease the plant out, ensuring you’re supporting its leaves and roots. This step is essential for supporting growth and providing stability in its new home. If you encounter resistance, don’t force it; just keep loosening the soil around the edges. Your tender care during this process sets the stage for a thriving, happy begonia that’ll flourish in its fresh pot!
Inspecting and Pruning the Roots
Inspecting and pruning the roots of your begonia is an essential step in keeping your plant healthy and thriving. Start by gently removing the plant from its pot, being careful not to damage the roots. Take a close look at the root system; healthy roots should be firm and white. If you spot any brown, mushy, or rotten roots, it’s time for some root pruning. Trim away these unhealthy sections with clean scissors, making sure to leave enough healthy roots for your begonia to recover. This process boosts root health and encourages new growth. Remember, a little attention now can lead to a happier, healthier plant in the long run. You’ve got this!
💡 Choosing the right variety can enhance your indoor space dramatically.
➜ Explore vibrant begonia varieties
Filling the New Pot With Soil
Now that you’ve inspected and pruned your begonia’s roots, it’s time to focus on filling the new pot with soil. First, you’ll want to choose the right potting mix that provides good drainage and nutrients for your plant. Once you’ve got your soil ready, use a proper filling technique to guarantee your begonia has a stable and healthy environment to thrive in!
💡 Proper display can enhance the beauty of your begonias and your home.
➜ Discover stylish display techniques
Choosing the Right Soil
Choosing the right soil for your begonia is essential for its health and growth, and it can make a significant difference in how your plant thrives. You want to look for a soil mix that supports good drainage while retaining some moisture. Here’s a simple guide to help you choose:
Soil Type | Drainage Importance | Best for Begonias |
|---|---|---|
Peat-based Mix | High | Retains moisture well |
Perlite Blend | Excellent | Promotes airflow |
Coco Coir | Moderate | Environmentally friendly |
Proper Filling Technique
When filling your new pot with soil, it’s important to do it the right way to set your begonia up for success. Using proper filling techniques is key to ensuring your plant thrives. Here’s how to layer the soil effectively:
- Add a Base Layer: Start with a layer of potting mix at the bottom of the pot. This provides good drainage and prevents water from sitting at the roots.
- Place Your Begonia: Gently position your begonia in the center, making sure it’s at the same depth it was in the previous pot.
- Fill Around the Sides: Carefully add more soil around the edges, pressing lightly to eliminate air pockets.
These steps help establish a healthy environment, making your begonia feel right at home!
Positioning Your Begonia in the New Pot
Positioning your begonia in the new pot is essential for its growth, as the right placement can make all the difference in how well it thrives. Start by ensuring the pot depth is suitable; your begonia should sit comfortably, with its roots well-covered but not buried too deep. Aim for about an inch of space between the soil surface and the top of the pot. Next, think about plant orientation. Place your begonia so that it faces the light source, allowing those lovely leaves to soak up all the sunshine they can. Adjust the soil around the roots gently, securing your plant in place. With everything set, your begonia is ready to flourish in its new home!
Watering and Caring for Your Repotted Begonia
Now that your begonia is settled in its new pot, it’s essential to focus on how to water and care for it properly. You’ll want to keep an eye on how often you water, as well as the humidity levels, since both play a big role in your plant’s health. Let’s explore the best practices to guarantee your repotted begonia thrives in its new home!
Watering Frequency Guidelines
Watering your repotted begonia can be a bit tricky, but following a few simple guidelines will help keep your plant thriving. Here are some watering frequency tips to take into account:
- Check weekly: Use your finger to feel the top inch of the soil. If it’s dry, it’s time to water.
- Observe moisture indicators: Yellowing leaves often signal overwatering, while crispy edges may mean your begonia is thirsty.
- Watering techniques: Always water deeply until it drains from the bottom, ensuring the roots get the moisture they need.
Ideal Humidity Levels
Creating the perfect environment for your repotted begonia involves more than just watering; humidity plays an essential role in keeping your plant happy and healthy. Begonias thrive in humidity levels between 50-70%. If your home’s air is too dry, you might notice your plant’s leaves curling or browning. To meet your begonia’s humidity preferences, consider using humidity sources like a pebble tray filled with water, a room humidifier, or even grouping it with other plants. Mist your begonia lightly, but avoid soaking the leaves, as that can lead to mold. By providing the right humidity, you’ll help your begonia flourish, ensuring it stays vibrant and full of life. Enjoy nurturing your beautiful plant!
Monitoring for Success After Repotting
Once you’ve repotted your begonia, keeping a close eye on its progress is essential for ensuring a successful change. You’re going to want to focus on monitoring growth and evaluating health in the weeks ahead. Here are three key things to watch for:
After repotting your begonia, monitor its growth and health closely for a successful transition.
- New Leaves: Look for fresh growth; this indicates your begonia is adapting well to its new home.
- Color Changes: Watch for vibrant leaf colors; dullness may signal stress or insufficient light.
- Water Needs: Pay attention to how often you need to water; overwatering can harm your plant, while underwatering can stunt its growth.
Conclusion
Repotting your begonia can feel like a mini adventure, transforming your plant’s home into a cozy castle! By following these steps, you’re not just giving your begonia a fresh start; you’re ensuring it thrives for years to come. Remember to keep an eye on its progress, watering and caring for it as needed. With a little patience and love, your begonia will flourish, proving that even plants can have their own dramatic glow-up, just like a reality TV star!
💡 Keeping your begonias healthy after repotting is essential to avoid common diseases.
➜ Learn to prevent leaf spot disease


