Propagating rubber plants is easy and fun! Start by choosing a healthy cutting with vibrant leaves, preferably in spring or summer. Gather your tools – sharp scissors, well-draining potting soil, and small pots. You can root your cutting in water or soil, depending on your preference. Make sure to provide bright, indirect light and keep the soil damp but not soggy. As your new plants grow, you’ll discover tips and tricks for ensuring their health and beauty!
Key Takeaways
- Choose healthy cuttings with vibrant leaves during spring or summer for optimal growth and propagation success.
- Use sharp scissors for clean cuts, ensuring each cutting has at least two leaves for energy.
- Select a rooting method: water propagation for visibility or soil propagation for immediate stability.
- Employ well-draining soil mixes and check moisture regularly to prevent overwatering and root rot.
- Maintain proper humidity and temperature, while monitoring for pests to ensure healthy growth.
Understanding Rubber Plants
Rubber plants, with their glossy green leaves and impressive height, make an eye-catching addition to any indoor space. Did you know their origins trace back to Southeast Asia? These beauties belong to the Ficus genus and have captivated plant lovers for generations. You’ll find various rubber plant varieties, each showcasing unique leaf shapes and colors, from the classic dark green to variegated versions that are simply stunning. These plants thrive in bright, indirect light and prefer a bit of humidity, so keep that in mind. As you care for your rubber plant, you’ll discover how resilient and rewarding they can be, inviting a sense of nature right into your home while enhancing your personal space with their vibrant presence. Understanding their light requirements is crucial for maintaining their health and vibrancy.
Choosing the Right Time for Propagation
When it comes to propagating your rubber plant, timing is everything! The best time for this exciting journey is during the spring season or the summer months. These warm, sunny periods encourage growth and help your new cuttings thrive.
Timing is crucial for propagating your rubber plant; spring and summer are ideal for promoting growth and thriving cuttings.
Consider these tips to make the most of your propagation experience:
- Watch for growth: Look for healthy, vibrant leaves; they’re a sign your plant is ready to share.
- Consider humidity: Higher humidity in spring and summer creates a cozy environment for roots to develop.
- Avoid cold spells: Propagating in cooler months can slow down progress, so wait for warmer days.
Tools and Materials Needed
Now that you’ve got the timing down for propagating your rubber plant, it’s time to gather the right tools and materials to guarantee success. Having the essential tools is vital for mastering various propagation techniques. Here’s a handy list to help you out:
Essential Tools | Purpose |
|---|---|
Sharp Scissors | To take clean cuttings |
Potting Soil | To provide nutrients |
Small Pots or Jars | To house your cuttings |
With these tools in hand, you’re well on your way to enjoying the rewarding experience of growing your rubber plant. So, gather your supplies, and let’s get ready for the next exciting step in your propagation journey!
Selecting a Healthy Cutting
Selecting a healthy cutting is vital for successful rubber plant propagation, so let’s explore what makes a cutting just right for your project. The quality of your cutting directly affects your propagation success, and choosing the right cutting sources is essential. Look for a stem that’s robust and vibrant, with healthy leaves.
Selecting a healthy cutting is crucial for successful rubber plant propagation; aim for a robust stem with vibrant leaves.
Here are a few tips to keep in mind:
- Choose a stem with at least two leaves: This guarantees it has enough energy for rooting.
- Inspect for signs of pests or diseases: A clean cutting increases your chances of success.
- Select a mature, yet not overly woody stem: This balance encourages healthy growth.
Preparing the Cutting
Getting your cutting ready is an exciting step in propagating a rubber plant! First, you’ll want to pick healthy leaves that show no signs of damage or disease, as they’ll give your new plant the best chance to thrive. Then, using the right cutting techniques and ensuring your piece is the proper length will set you up for success in rooting.
Selecting Healthy Leaves
How can you guarantee your rubber plant cutting thrives? The secret lies in your leaf selection. Choosing healthy leaves is essential for successful propagation. When selecting leaves, keep an eye on leaf health, as this will directly impact your cutting’s potential. Here are some tips to help you pick the best leaves:
- Look for vibrant, glossy surfaces—these indicate a well-nourished leaf.
- Avoid any signs of discoloration or spots, which can signal disease or stress.
- Choose mature leaves from the upper part of the plant, as they often contain more nutrients.
Cutting Techniques Explained
When it comes to propagating your rubber plant, the cutting techniques you use can make all the difference in ensuring your new plant thrives. Start by selecting a healthy stem and use sharp scissors or pruning shears. Aim for a cutting angle of about 45 degrees; this helps the cutting absorb water more effectively. Remember, the cleaner the cut, the better chance your plant has of rooting successfully. You can experiment with various propagation techniques, like water or soil propagation, but the cutting itself is essential. Don’t forget to remove any lower leaves to avoid rot and focus on creating a strong foundation for your new plant. With the right techniques, you’re on your way to growing a beautiful rubber plant!
Ensuring Proper Length
Ensuring the right length for your cutting is an essential part of preparing it for propagation. A well-chosen cutting length can greatly boost your chances of propagation success. Aim for a length of about 6 to 8 inches, as this gives your plant a strong foundation to grow.
- Choose a cutting with at least one node for better growth potential.
- Remove any excess leaves to focus the plant’s energy on root development.
- Make your cut just below a node for best results.
Rooting Methods: Water vs. Soil
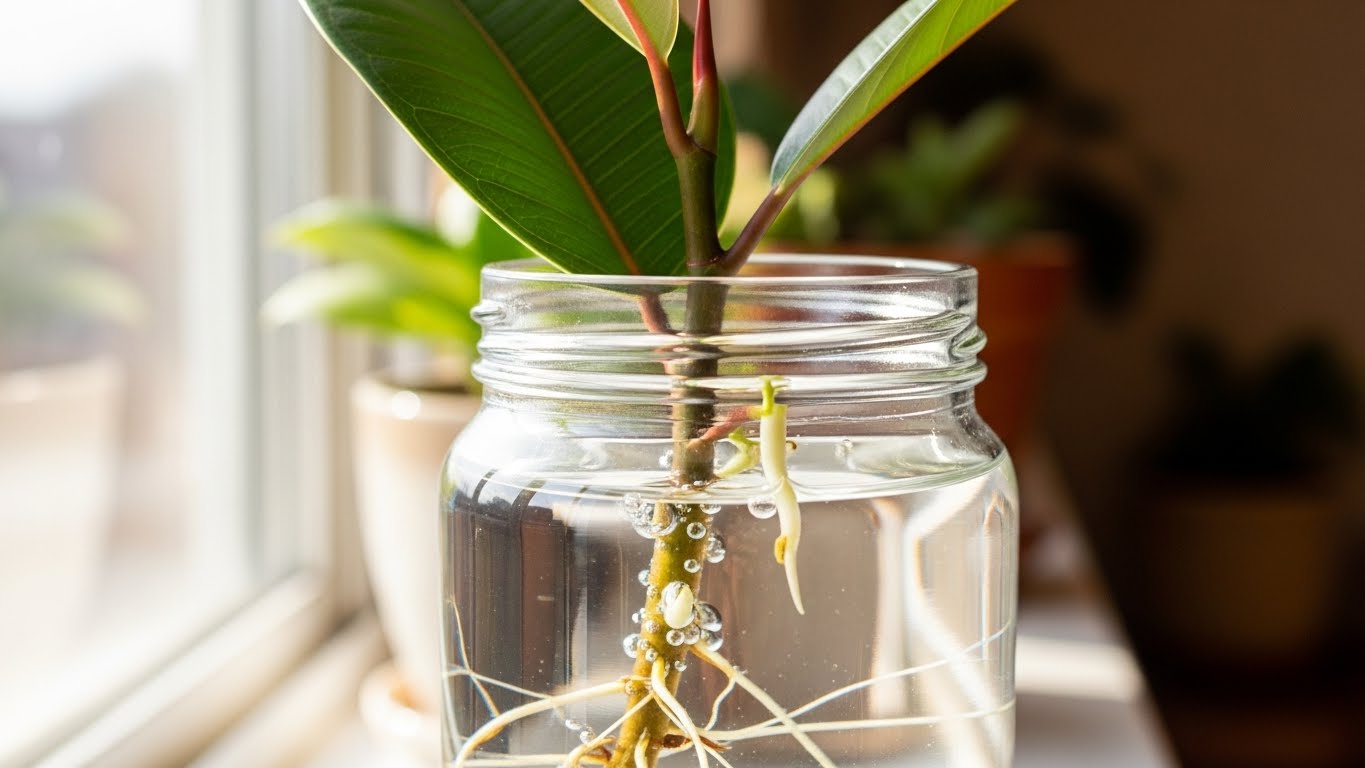
Choosing the right rooting method for your rubber plant cuttings can be exciting, as both water and soil offer unique advantages. With water propagation, you’ll get to see those lovely roots developing right before your eyes, fostering a connection with your cutting. Just place it in a clear jar, and watch it thrive! On the other hand, soil propagation allows your cutting to establish itself in its future home right away, giving it that strong foundation to grow. While water is great for visual excitement, soil can lead to a more robust plant. Ultimately, it’s about your personal preference and patience. Both methods work beautifully, so jump in and choose the one that feels right for you!
Caring for Your Cuttings
Caring for your rubber plant cuttings is essential for ensuring they thrive and grow into healthy plants. Start by focusing on cutting maintenance to foster strong roots. Keep an eye on humidity levels; rubber plants love moisture! Here are a few tips to keep your cuttings happy:
- Mist regularly: Spraying your cuttings helps maintain that perfect humidity, which encourages growth.
- Provide indirect light: Too much sun can scorch the leaves, while too little can hinder growth. Aim for bright, filtered light.
- Water wisely: Allow the soil to dry out slightly between waterings to prevent rot, but don’t let them dry out completely.
Transplanting New Rubber Plants
Transplanting your new rubber plants is an exciting step in their growth journey! To guarantee success, you’ll need to choose the right pot, understand soil requirements, and know how to water them after moving. Let’s explore these key points so your rubber plants can thrive in their new homes!
Choosing the Right Pot
When you’re ready to give your new rubber plant a cozy home, selecting the right pot is essential for its growth and health. A well-chosen pot sets the stage for your plant’s flourishing journey.
- Pot Size: Choose a pot that’s 1-2 inches larger than your plant’s root ball to encourage healthy growth.
- Drainage Holes: Make sure the pot has drainage holes to prevent waterlogging and root rot.
- Material Matters: Consider materials like terracotta or ceramic, which allow airflow and moisture regulation.
Soil Requirements Explained
Once you’ve picked the perfect pot for your rubber plant, the next step is to focus on its soil requirements. Choosing the right soil type is important, as rubber plants thrive in well-draining mixes. You want to create an environment that mimics their natural habitat, so look for a blend that includes peat moss, perlite, or orchid bark. These components not only provide essential nutrients but also guarantee proper drainage—this is essential because rubber plants don’t like sitting in soggy soil. Remember, good drainage helps prevent root rot, keeping your plant healthy and happy. With the right soil mix, you’ll set your rubber plant up for success, allowing it to grow strong and vibrant!
Watering After Transplanting
After you’ve carefully transplanted your rubber plant into its new pot, the next important step is to guarantee it gets the right amount of water. This helps ease transplant shock and supports root establishment. Watering too much or too little can stress your plant, so follow these tips:
- Check the soil moisture: Stick your finger about an inch into the soil; if it’s dry, it’s time to water.
- Water evenly: Give your plant a good soak until water drains from the bottom, ensuring the roots get hydration.
- Avoid overwatering: Let the top inch of soil dry out between waterings to prevent root rot.
With patience and care, you’ll help your rubber plant thrive in its new home!
Common Challenges and Solutions
Propagating rubber plants can be a fun and rewarding experience, but it doesn’t come without its challenges. You’ll likely encounter leaf discoloration, which can signal issues with humidity levels or nutrient deficiencies. To combat this, make certain your plant has the right moisture and light conditions. Root rot is another common problem, often caused by overwatering. Keep an eye on your watering habits and let the soil dry out between waterings. Don’t forget about pest management—regularly check for pests and treat them promptly to avoid disease prevention headaches. By addressing these challenges, you can enhance your propagation success and enjoy watching your rubber plants thrive. Remember, patience and attention are your best allies!
Tips for Healthy Growth
To guarantee your rubber plant grows healthy and strong, it’s essential to pay attention to its environment and care routine. Start by ensuring proper temperature control; rubber plants thrive in warm conditions, ideally between 65°F to 80°F. Regularly check for pests, as early pest management can prevent damage and keep your plant thriving.
Here are some tips to help your rubber plant flourish:
- Consistent Watering: Water when the top inch of soil feels dry, but avoid overwatering.
- Bright, Indirect Light: Place your plant near a window with filtered light for peak growth.
- Humidity Boost: Increase humidity with a pebble tray or misting, as rubber plants enjoy a bit of moisture.
Following these tips will help nurture your plant into a beautiful indoor companion!
Enjoying Your New Rubber Plants
Now that you’ve successfully propagated your rubber plants, it’s time to enjoy them by providing the right conditions for growth. Make sure they get ideal light, water them appropriately, and don’t forget to fertilize for the best results. With a little attention, you’ll see your new plants thrive and flourish in your space!
Optimal Light Conditions
When you’ve just brought home your new rubber plants, understanding their light needs becomes crucial for their growth and happiness. These lovely plants thrive best in bright, indirect sunlight. Too much direct sun can scorch their leaves, while too little light can hinder their growth. Finding that perfect balance is key!
Here are some tips to guarantee your rubber plants bask in the right light intensity:
- Place them near a window with filtered light.
- Rotate the pots every few weeks for even growth.
- Monitor their leaves; yellowing may signal too much light.
Watering Guidelines
Watering your rubber plants is an essential part of keeping them healthy and happy, so it’s important to get it just right. Start by establishing a frequency schedule that works for you; typically, watering every 1-2 weeks is a good place to begin. Always check the moisture levels in the soil first—stick your finger about an inch deep. If it feels dry, it’s time to water! When you do, give them a good soak until water drains from the bottom. This guarantees the roots absorb enough moisture without sitting in excess water, which can lead to root rot. Remember, consistency is key, and soon you’ll see your rubber plants thriving and adding beauty to your home!
Fertilization Tips
Fertilizing your rubber plants is a fantastic way to support their growth and keep them looking vibrant. By using organic fertilizers, you can guarantee that your plants receive the nutrients they need without harsh chemicals. Opt for slow release options to provide a steady supply of nutrients over time, making it easier for your plants to thrive. Here are a few tips to keep in mind:
- Fertilize every 4-6 weeks during the growing season.
- Dilute your fertilizer to prevent over-fertilization, which can harm your plants.
- Pay attention to your plant’s response; if the leaves turn yellow, you might be fertilizing too much.
With these tips, you’ll nurture your rubber plants to flourish beautifully in your home!
Conclusion
Now that you’ve learned how to propagate rubber plants, you’re ready to plunge into this exciting green adventure! Did you know that rubber plants can grow up to 100 feet tall in their natural habitat? While yours may not reach those heights indoors, with a little care, your new plants can thrive beautifully. So, grab your tools, choose a healthy cutting, and start your propagation journey. Soon, you’ll have vibrant rubber plants that add life to your space!


